Before you start
The visitor registration system runs in your web browser — no app to install, no account to create. Phone or computer both work.
- Website: https://visitor.sccc.dev/ (tap the EN button on the top right to switch the site to English)
- What you need: your real passport (Thai nationals: Thai ID card) and a device with a camera
- Time needed: request + face registration about 5 minutes / safety video about 10 minutes
1. Submit an access request
From the home page, tap "Create new request" and fill in the form — about 3-5 minutes
-
Choose your ID type, enter the number, then tap "Verify"
Foreign visitors: select "Passport" and enter your passport number exactly as printed in your passport (Thai nationals: keep "Thai ID Card" and enter the 13-digit ID). If you have registered before, the system fills in your details automatically.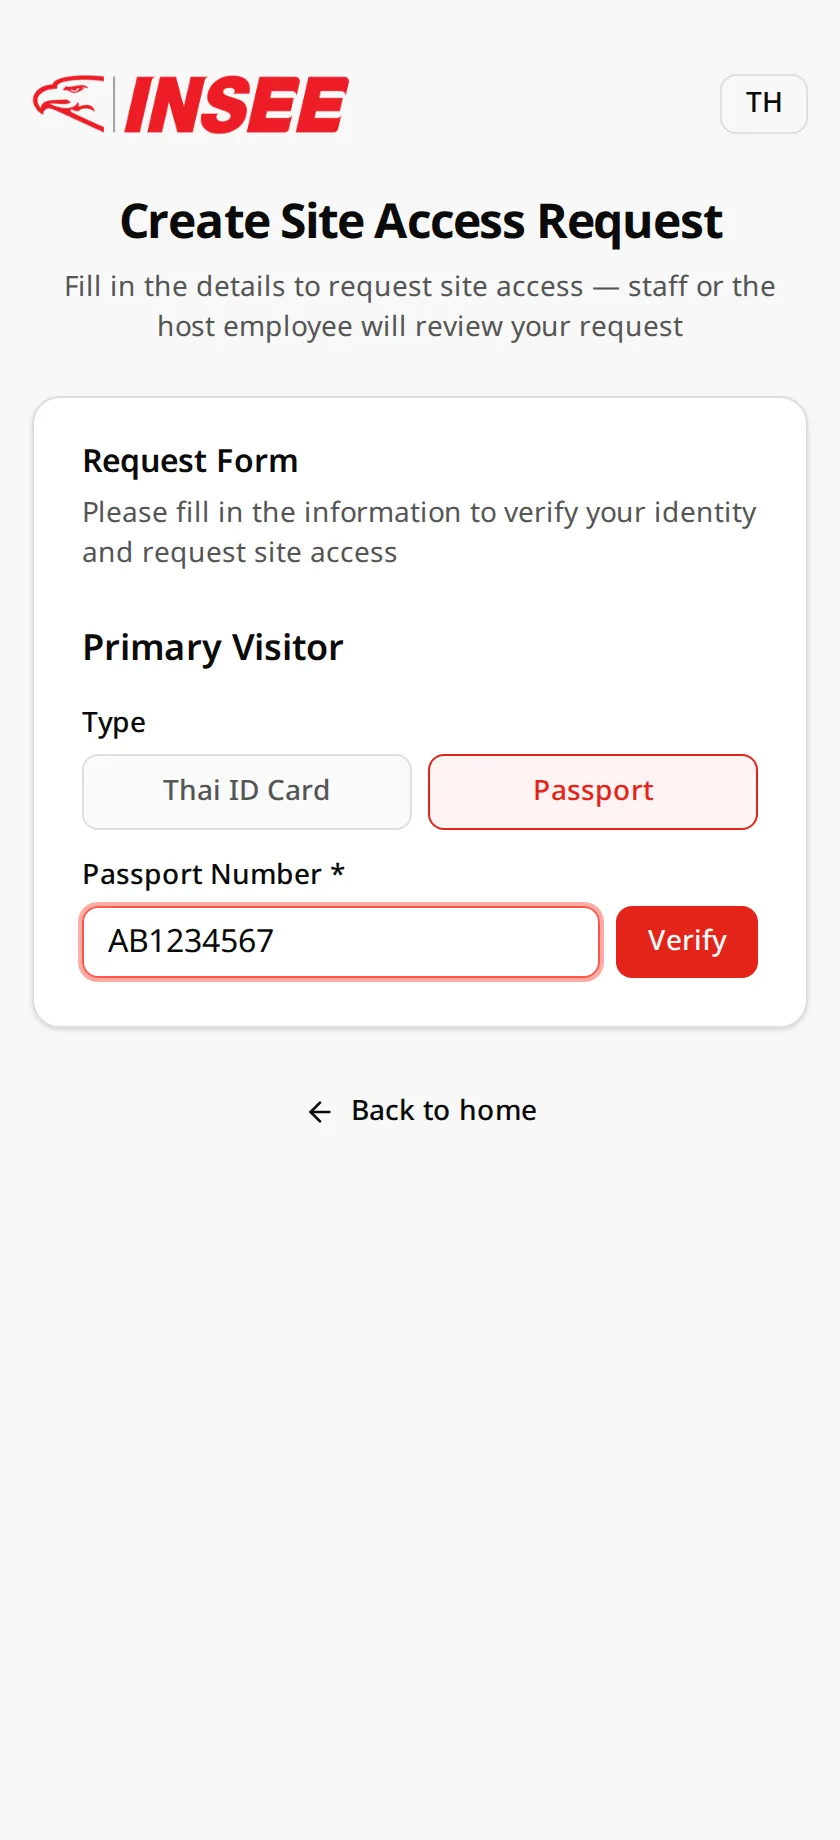
Select "Passport", enter the number, tap "Verify" -
Fill in your name and phone number
Email is optional, but if provided you will receive the approval result by email. Visiting as a group? Tap add companion and enter each person's ID in the same request.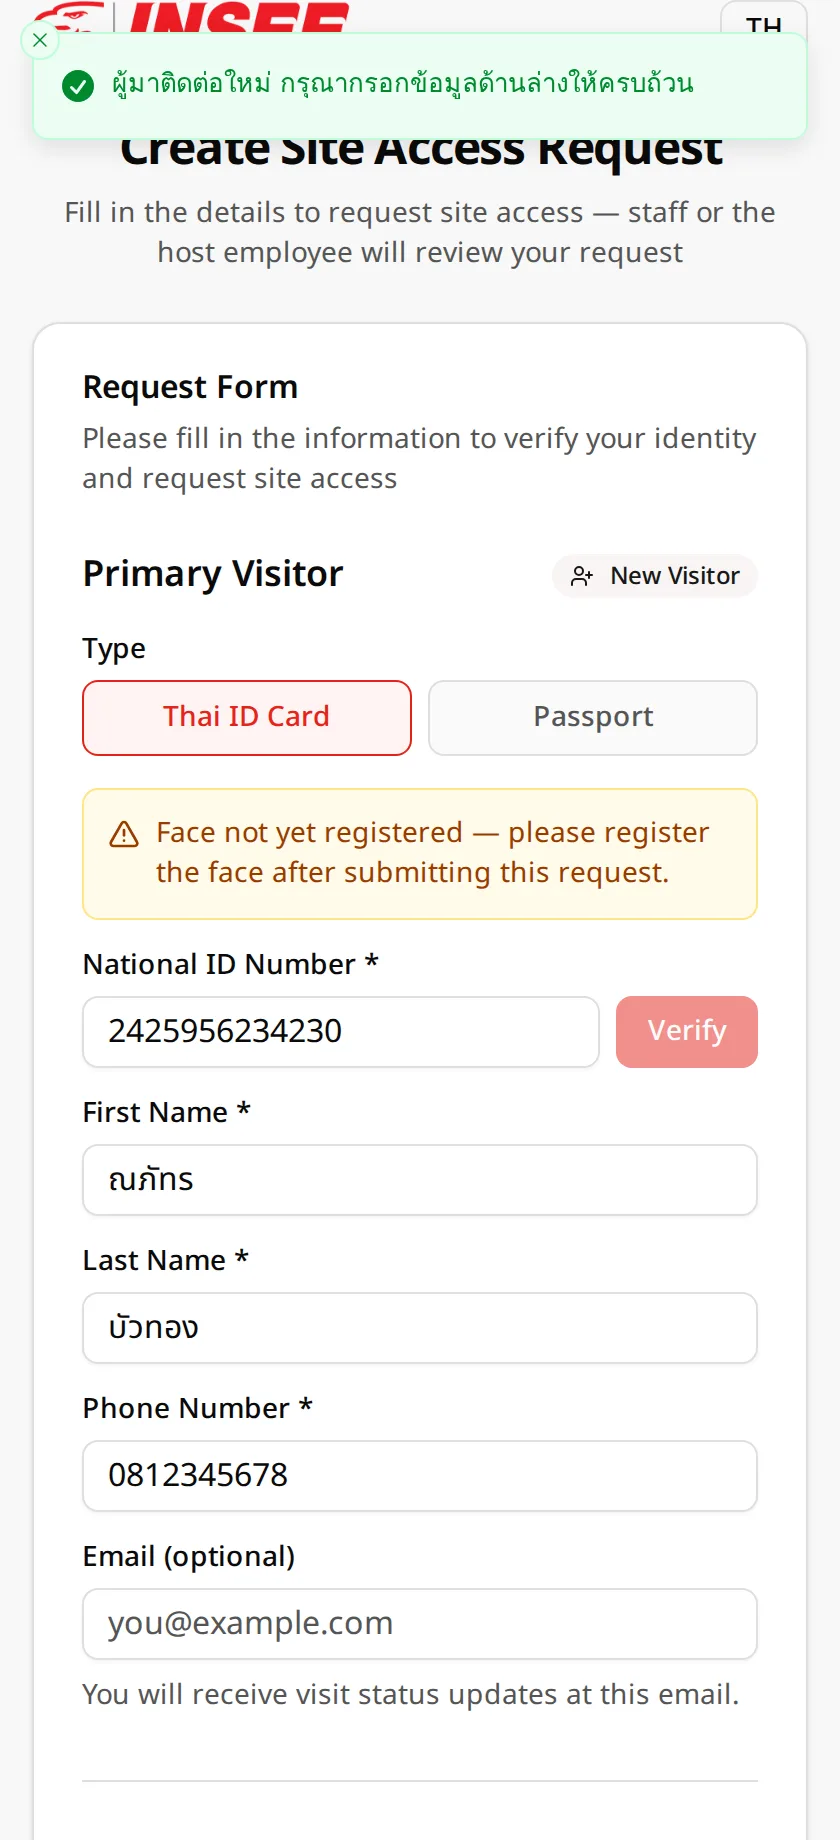
Primary visitor details -
Pick your visit date and time
Choose the start and end date (same date for a one-day visit) and your expected arrival time — past dates are not accepted.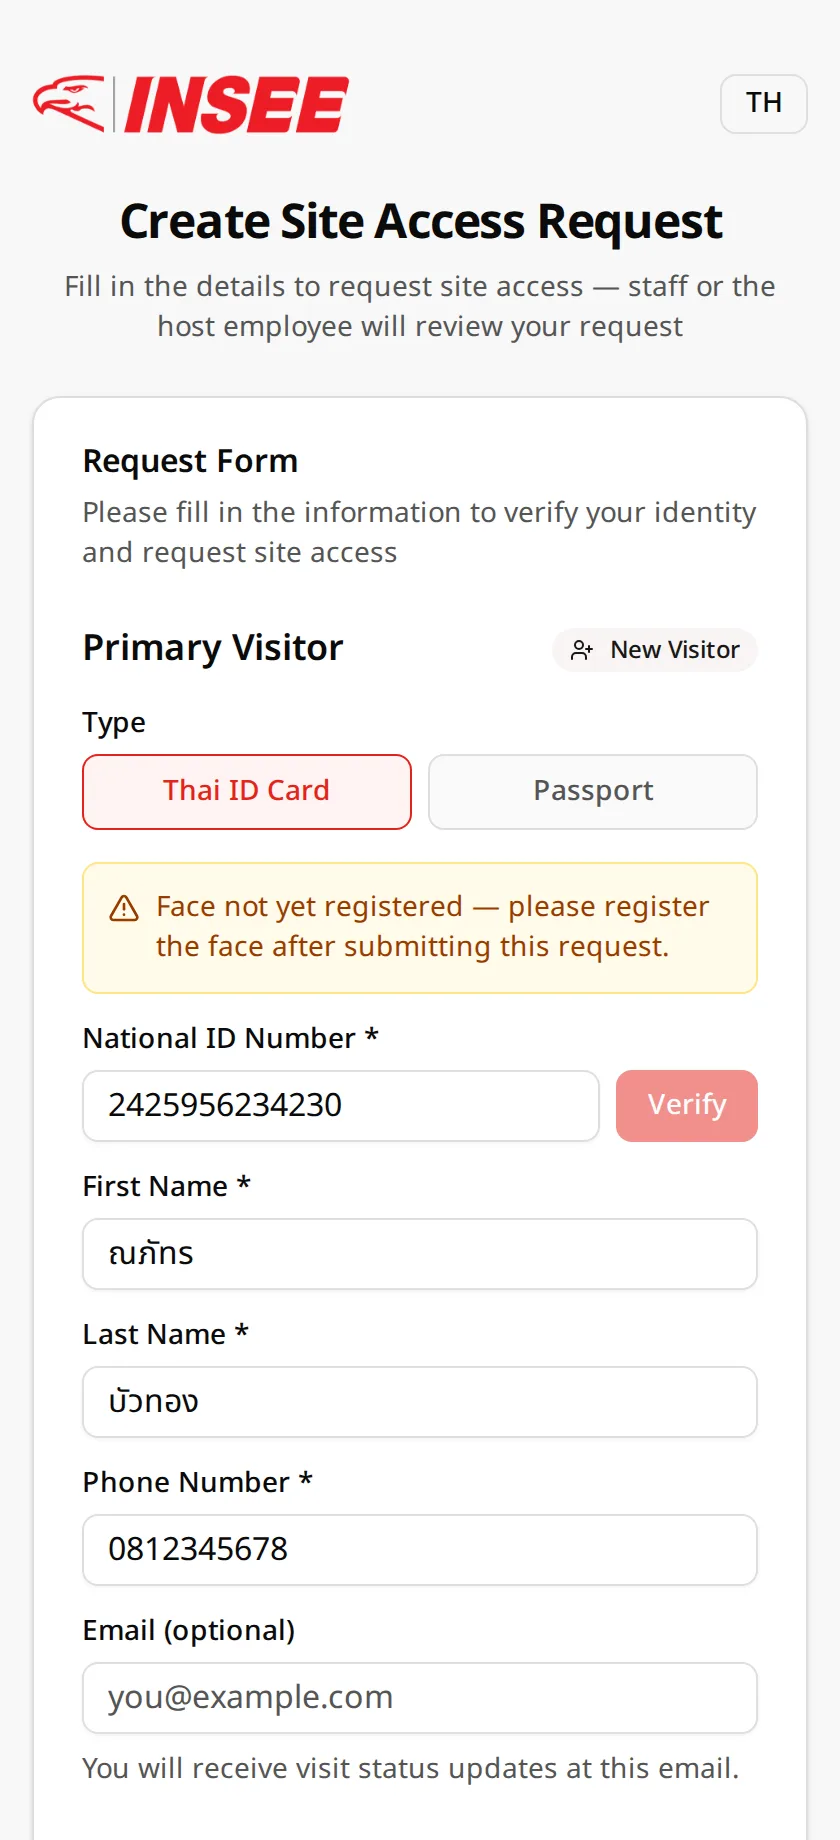
Visit date and time -
Enter your company and purpose
Fill in your company/organization (personal visits are fine too) and the purpose of the visit, e.g. meeting, document delivery, construction inspection.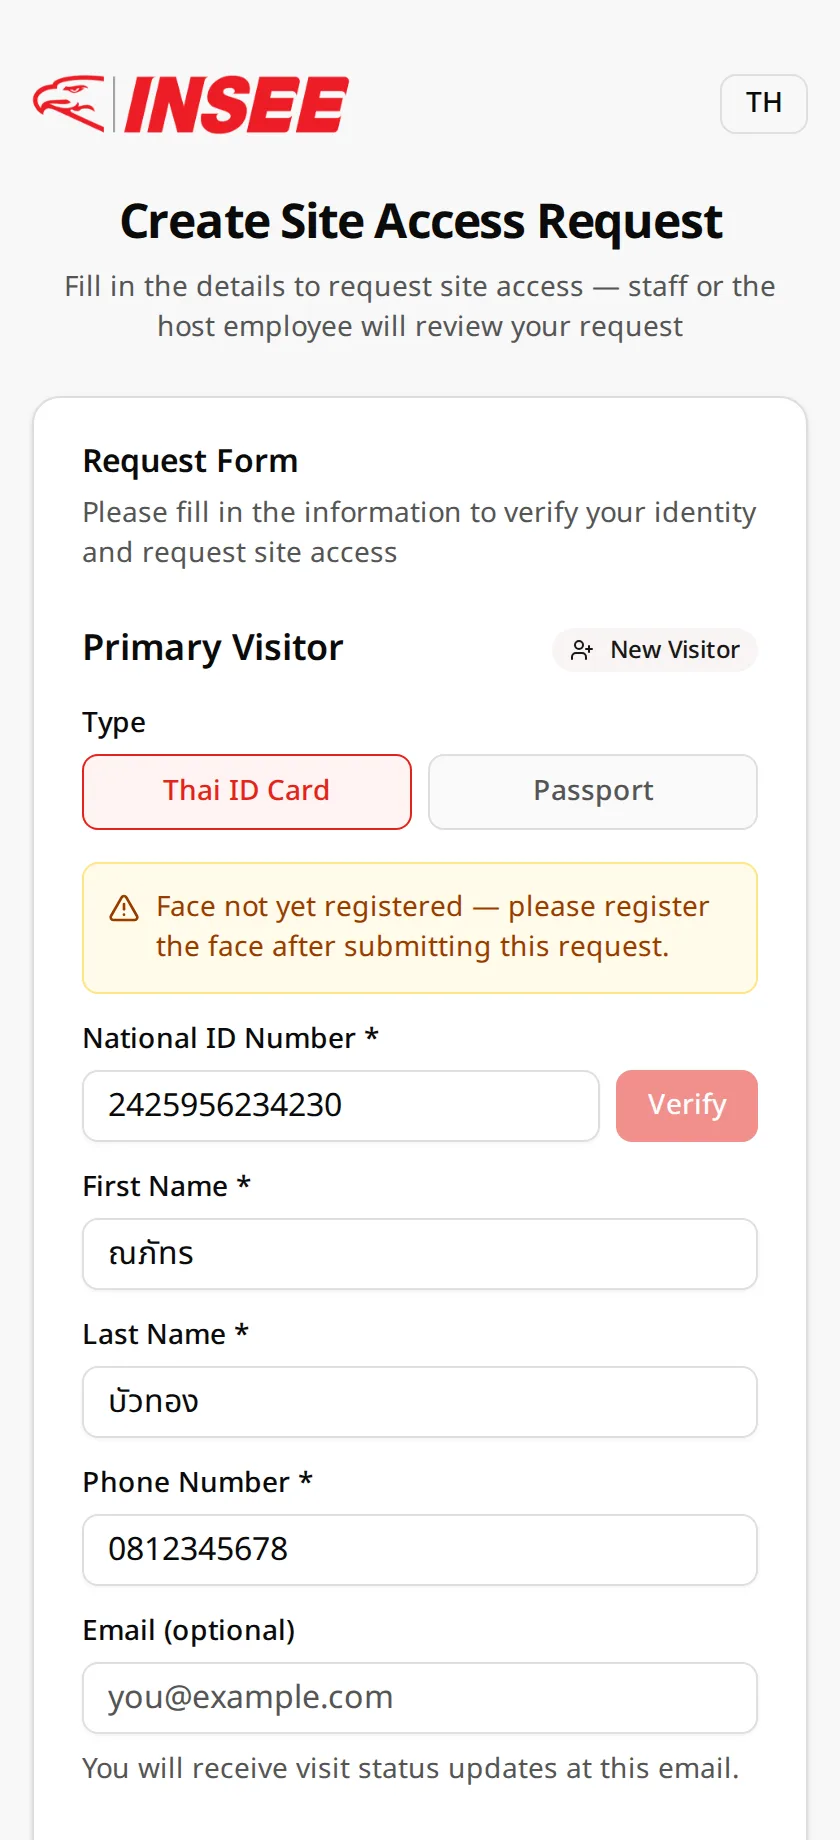
Company and purpose -
Add a vehicle (if driving in)
Tap add vehicle, enter the plate number and province, and pick the driver from the people in this request — walking in? Leave it empty.Important: vehicles not listed in the request cannot enter the site.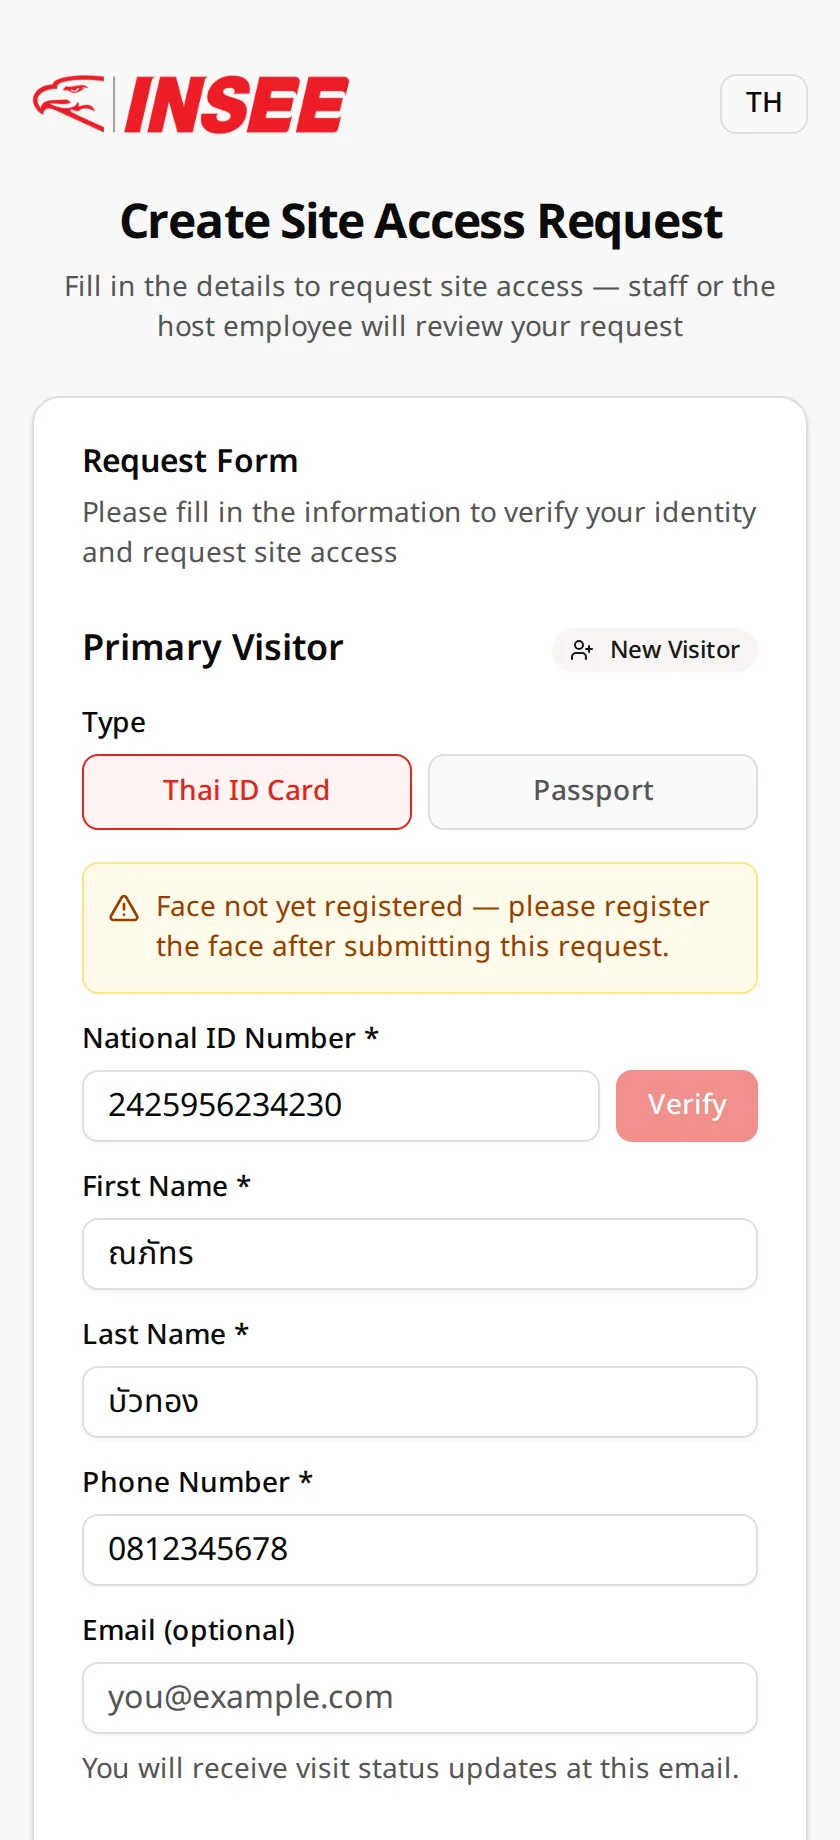
Plate, province and driver -
Name your INSEE contact
Type at least 3 characters of your INSEE contact's name and pick them from the list — the approval link goes straight to their email. Name not found? Just type it in; staff will review and approve instead.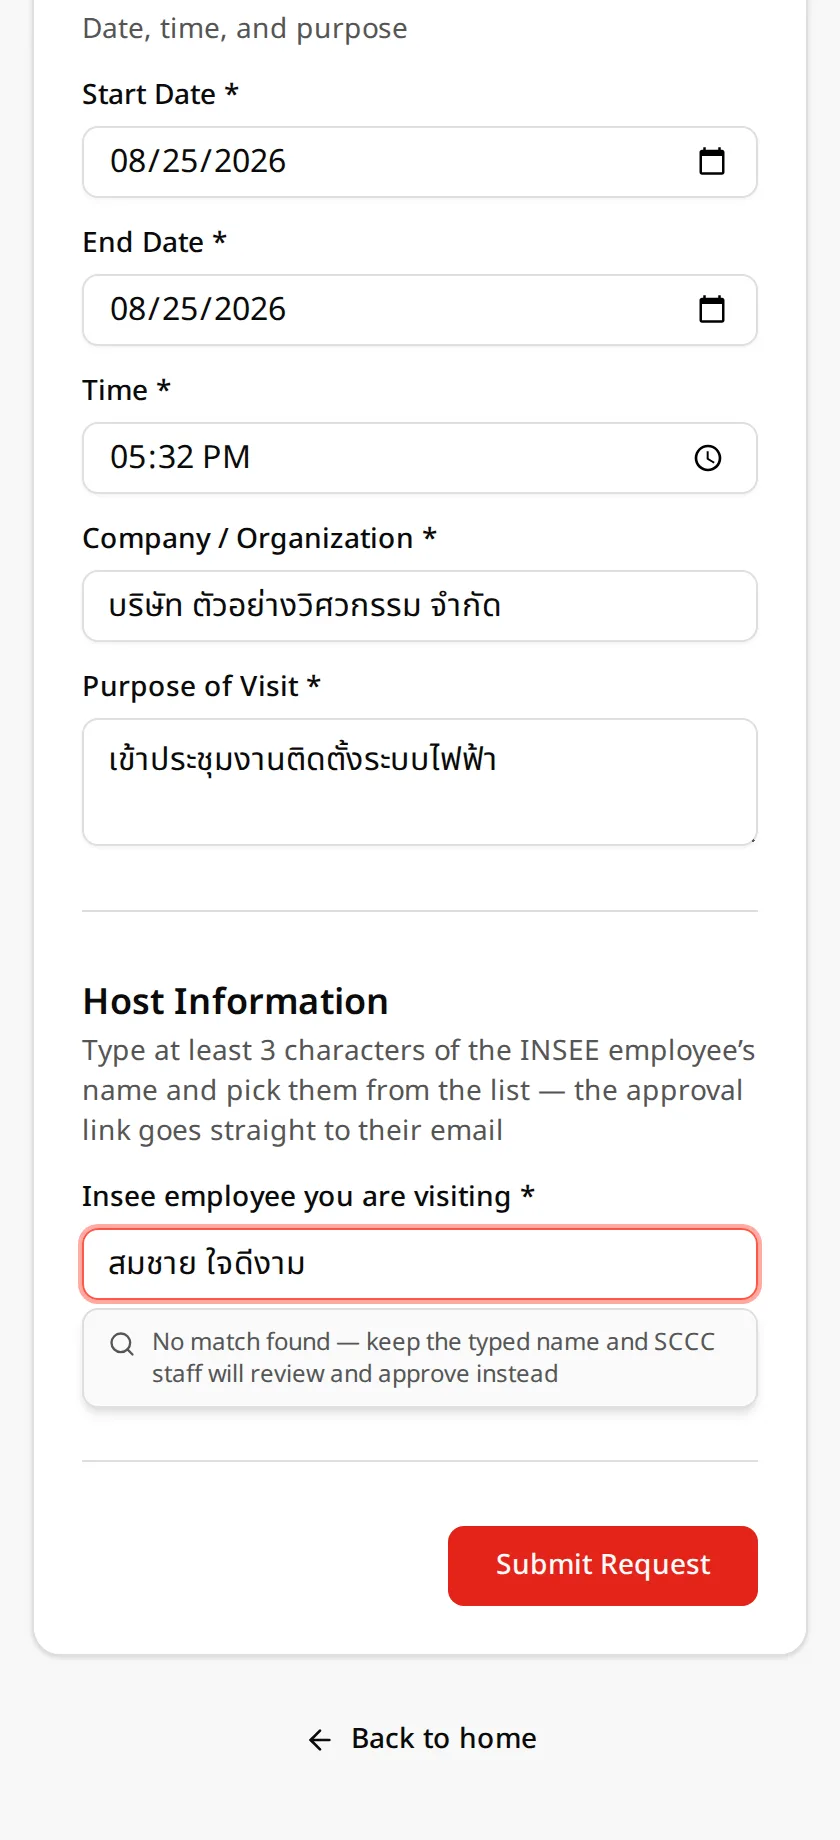
Type your INSEE contact's name -
Submit and note your request number
On success you get a request number (e.g. VIS-260824-0002) — keep it for reference. While waiting for approval, you can register your face right away from this page.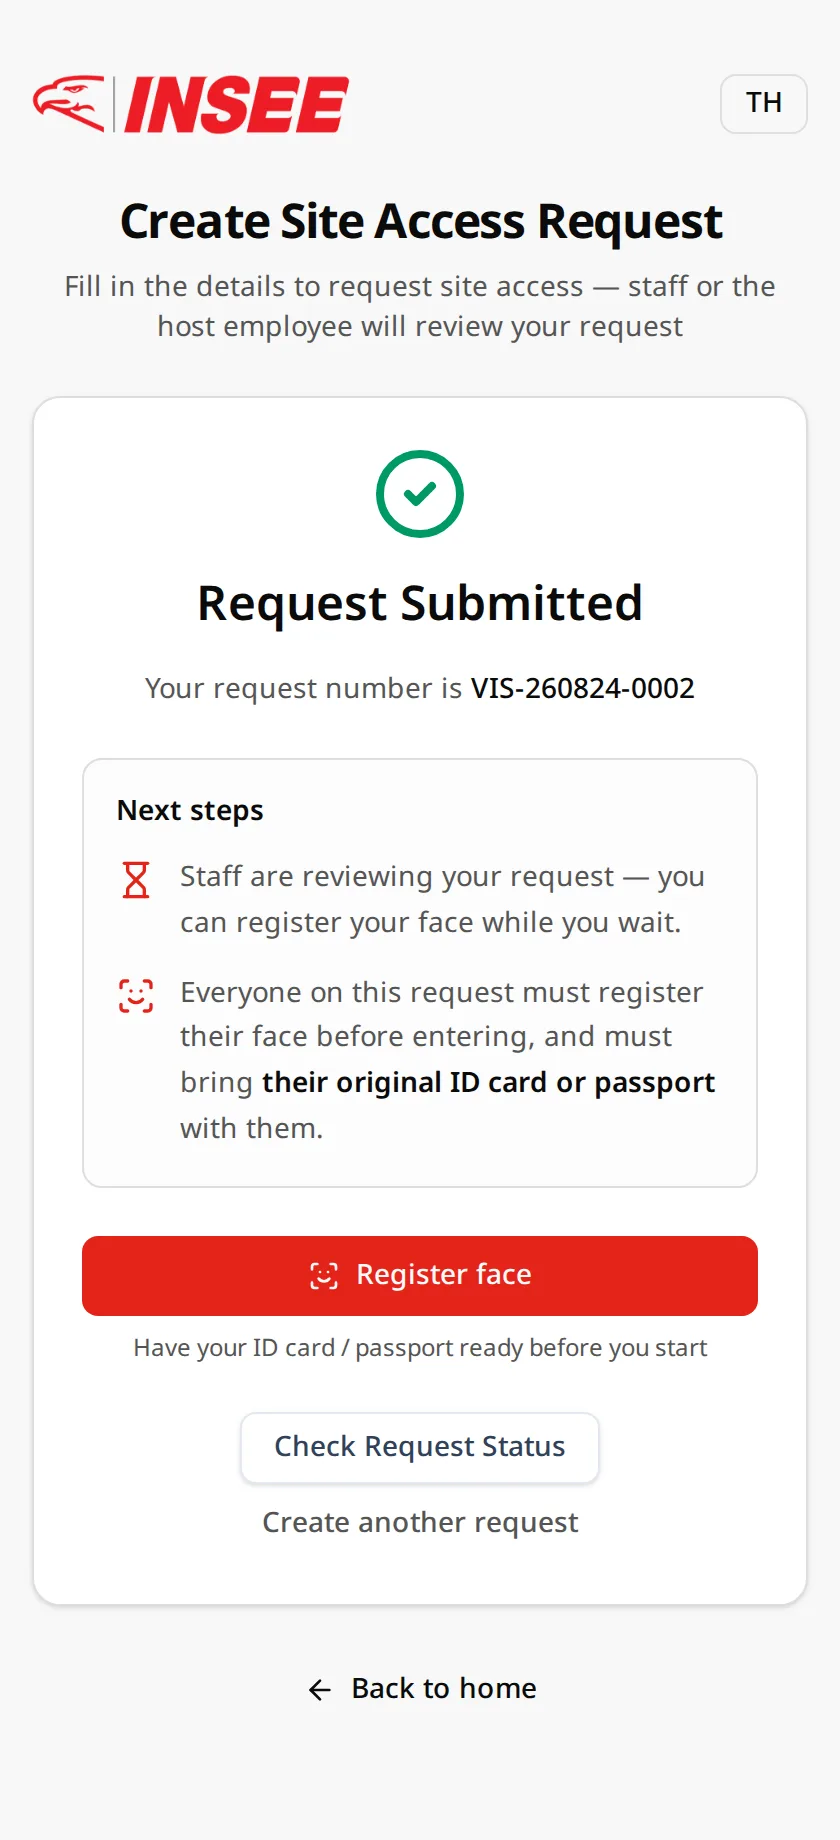
Confirmation with your request number
2. Register your face
Everyone in the request must register their face before entering — it lets you walk through the factory gate with a face scan, no badge needed. Have your real ID card or passport ready.
-
Enter your passport (or ID) number
Open "Check access status" from the home page, or tap "Register face" right after submitting — select "Passport" and enter the same passport number you used in the request (an access request must exist first).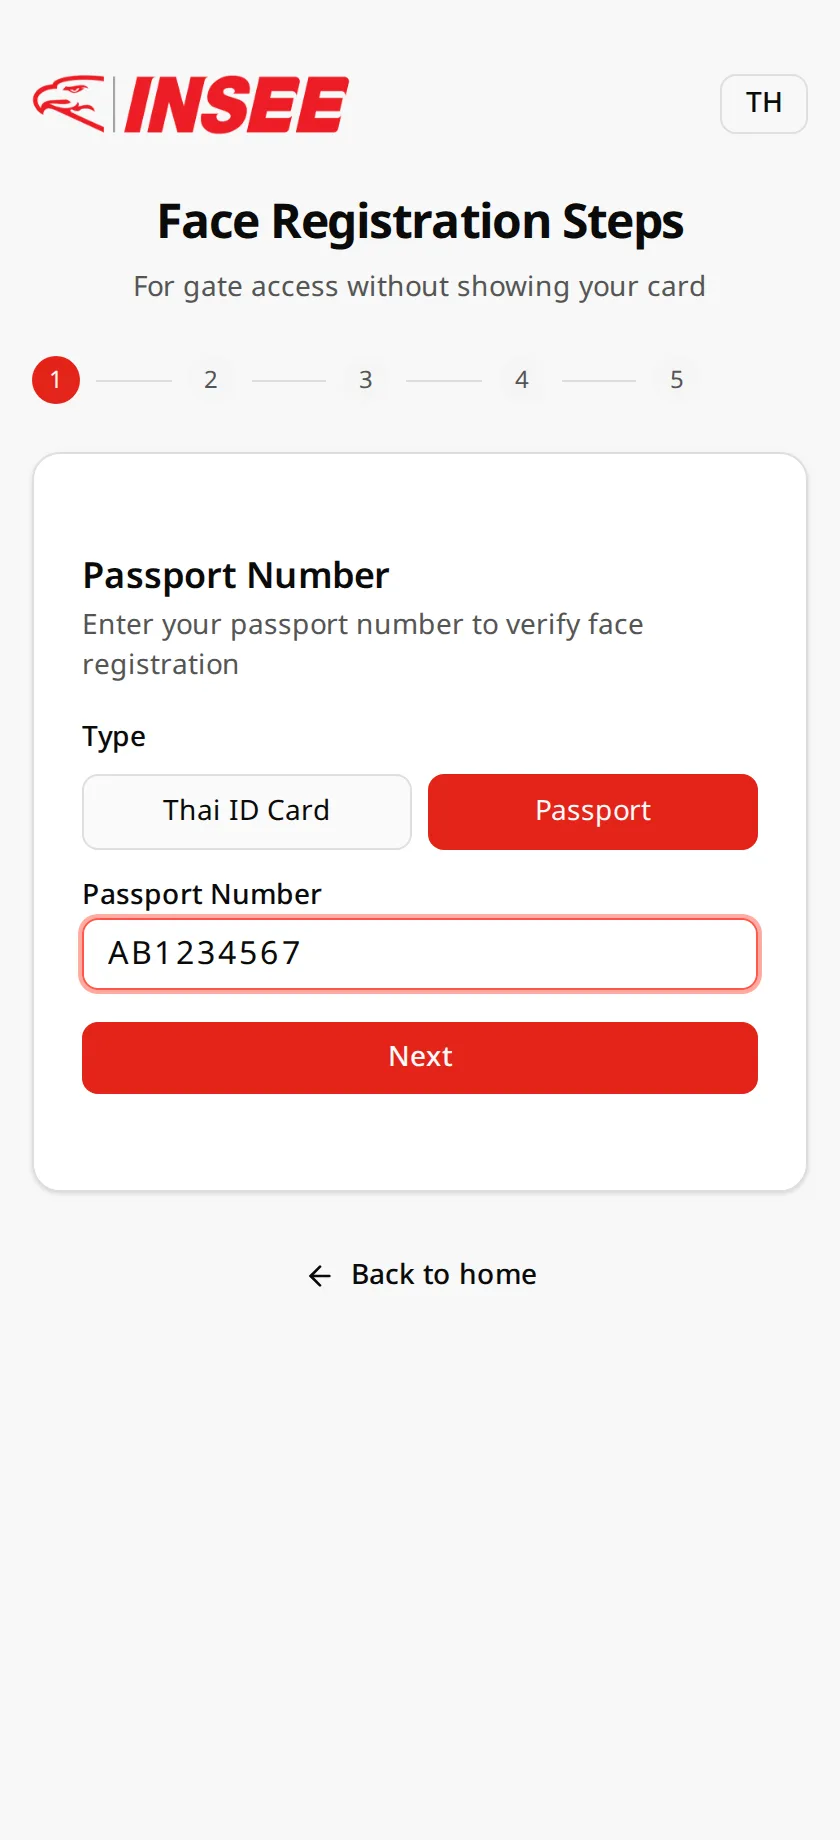
Step 1 — passport number -
Photograph your passport
Take a clear photo of your passport's photo page — or of your Thai ID card if you registered with one — or pick an image from your gallery. The system reads it to confirm it matches the number you entered. Takes a few seconds.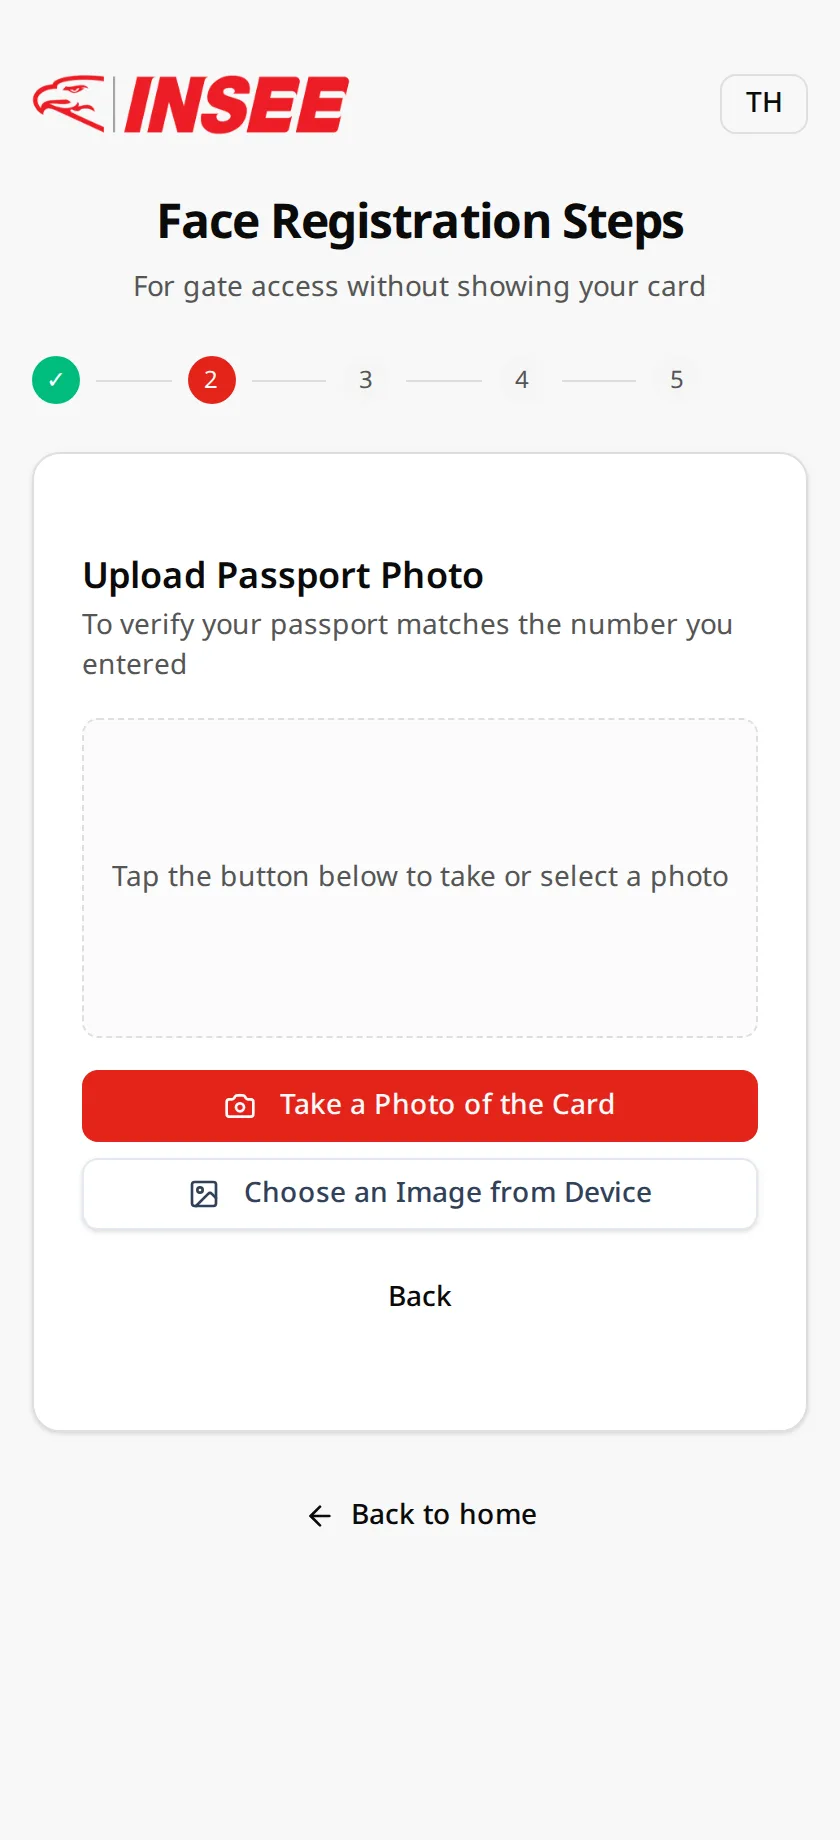
Step 2 — passport photo page -
Read and give consent
Read the face-image consent notice (per Thailand's PDPA) and tick the consent box — you can withdraw consent later.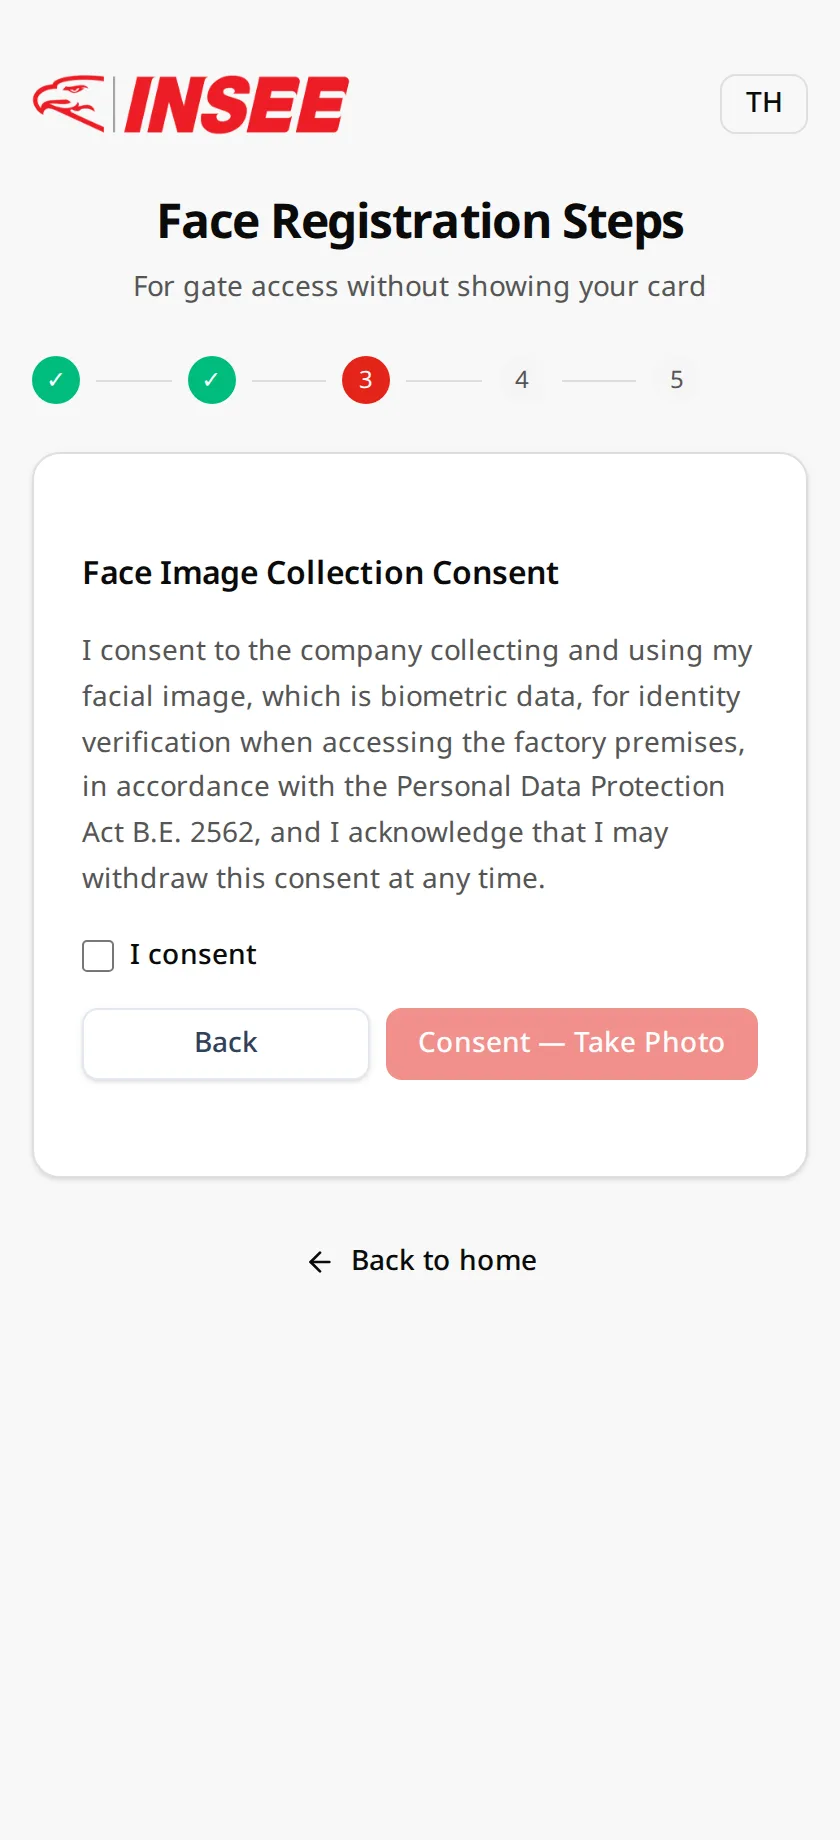
Step 3 — consent -
Take the face photo — auto capture
Keep your face inside the oval, in good light, glasses and mask off, natural expression, look straight at the camera — when the image passes the checks, the system counts down and takes the photo for you.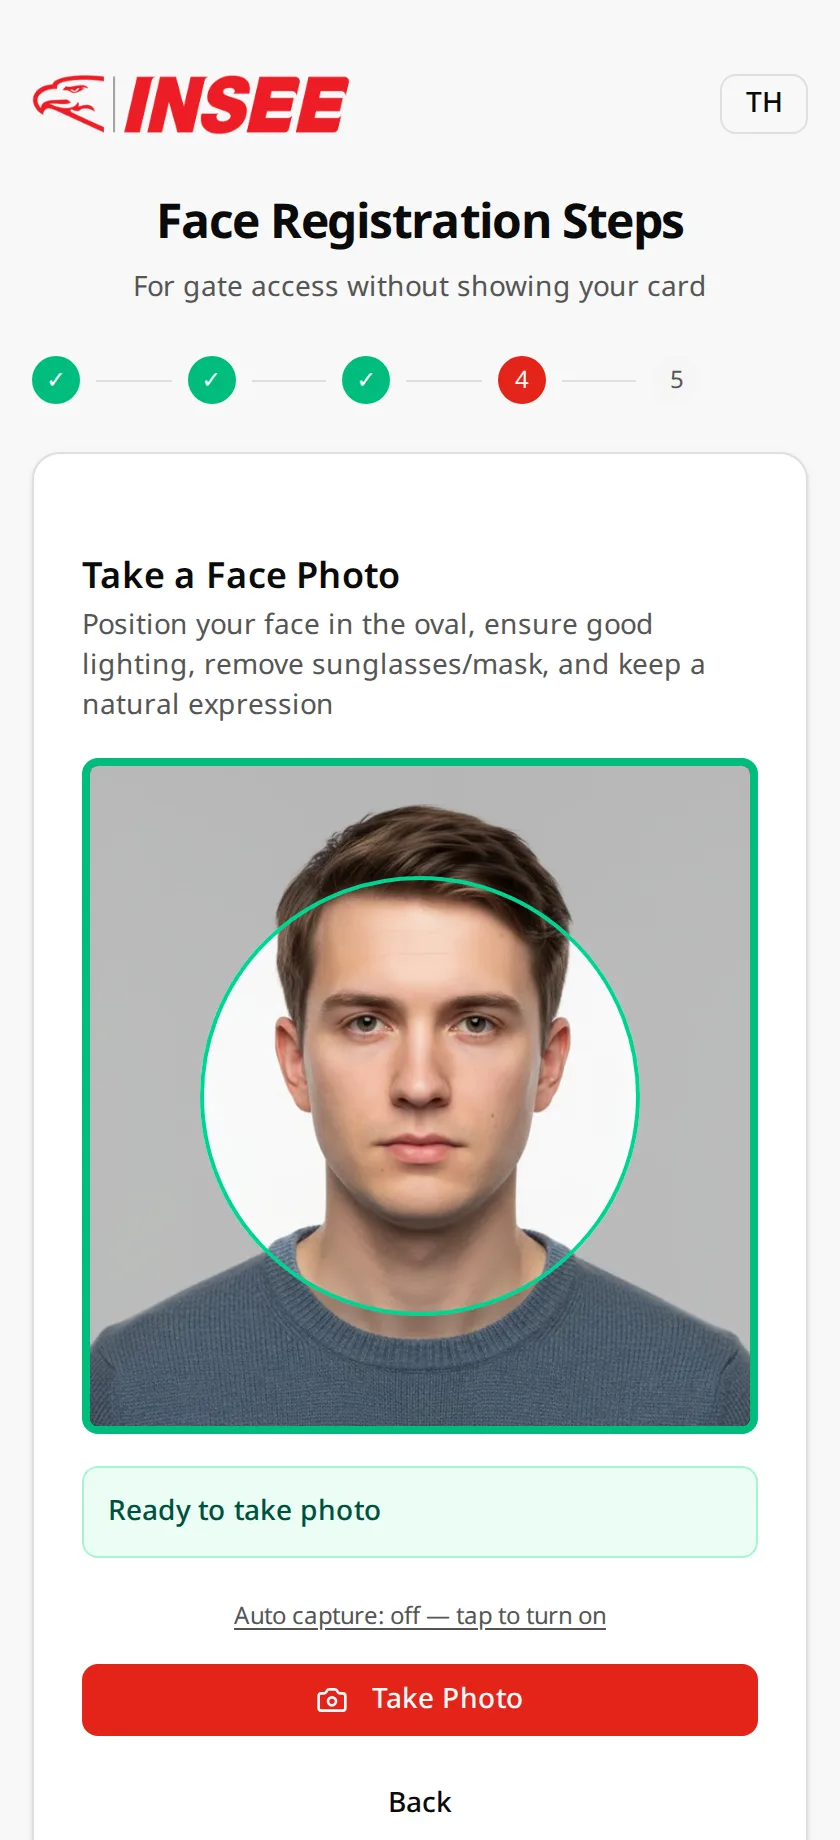
Step 4 — auto capture -
Face registration complete
The system shows when your face data expires (about 90 days — for a later visit after that, simply register again the same way).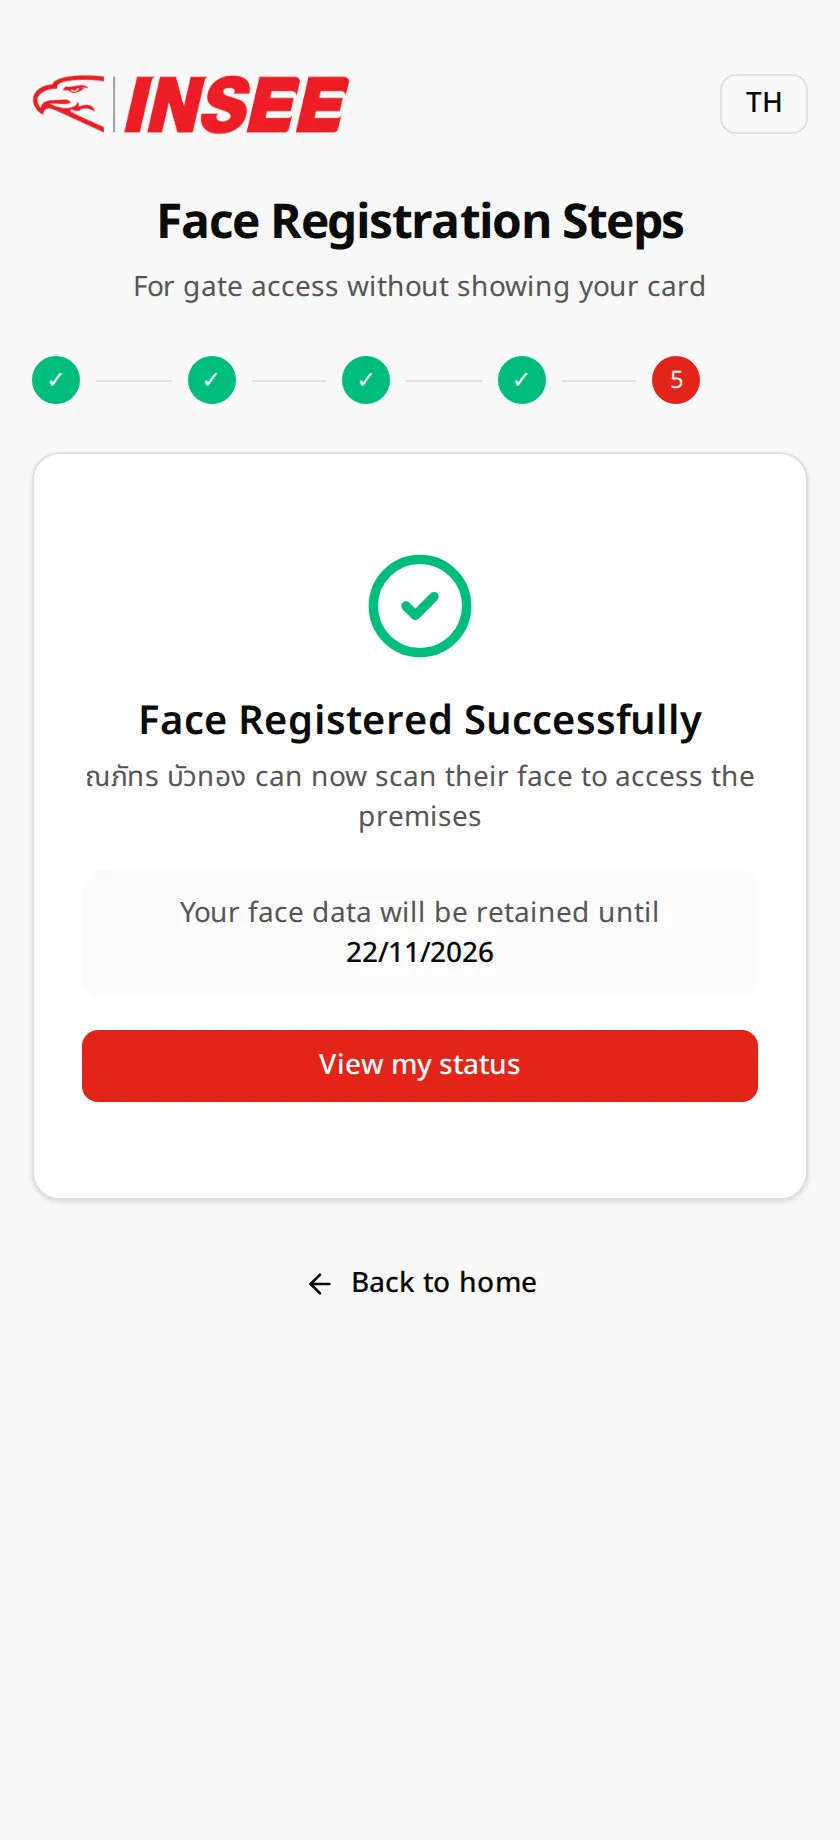
Face registered
3. Watch the safety video
Before entering you must pass the online safety training — watch the video to the end and answer all quiz questions correctly. A pass is valid for 1 year.
-
Watch the video to the end
Open "Check access status" → "Safety video", enter your ID and watch the video (~9 minutes) — skipping ahead is disabled; it must play to the end.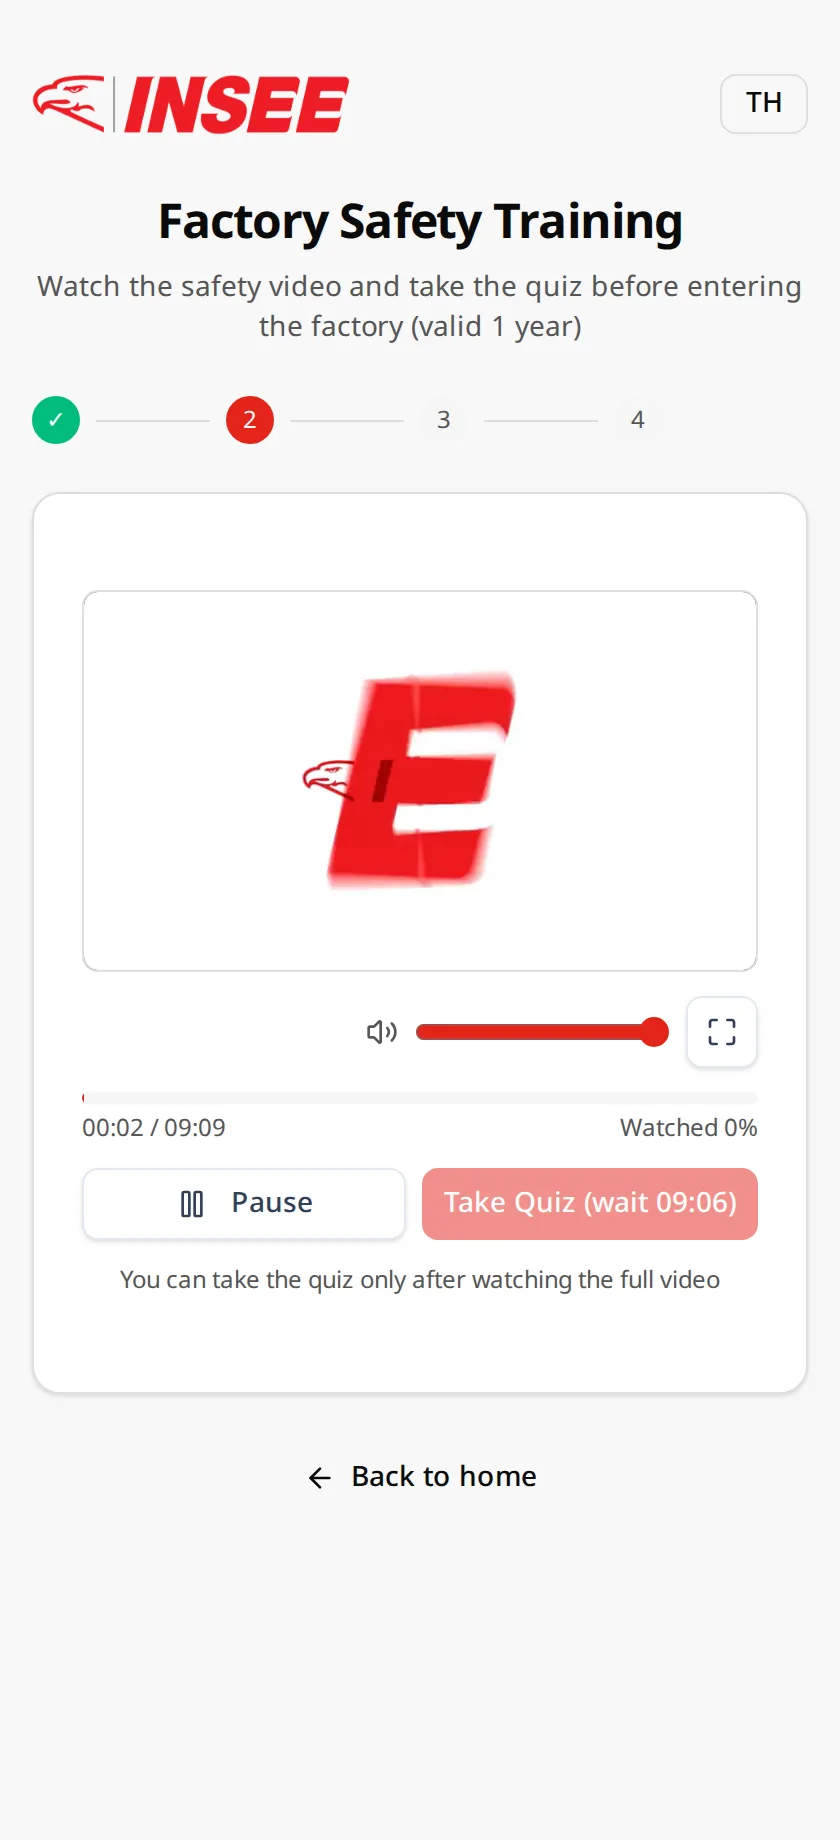
Safety video player -
Answer all 3 questions correctly
After the video, answer a 3-question quiz — all answers must be correct to pass. Got one wrong? Retry immediately with a fresh set of questions.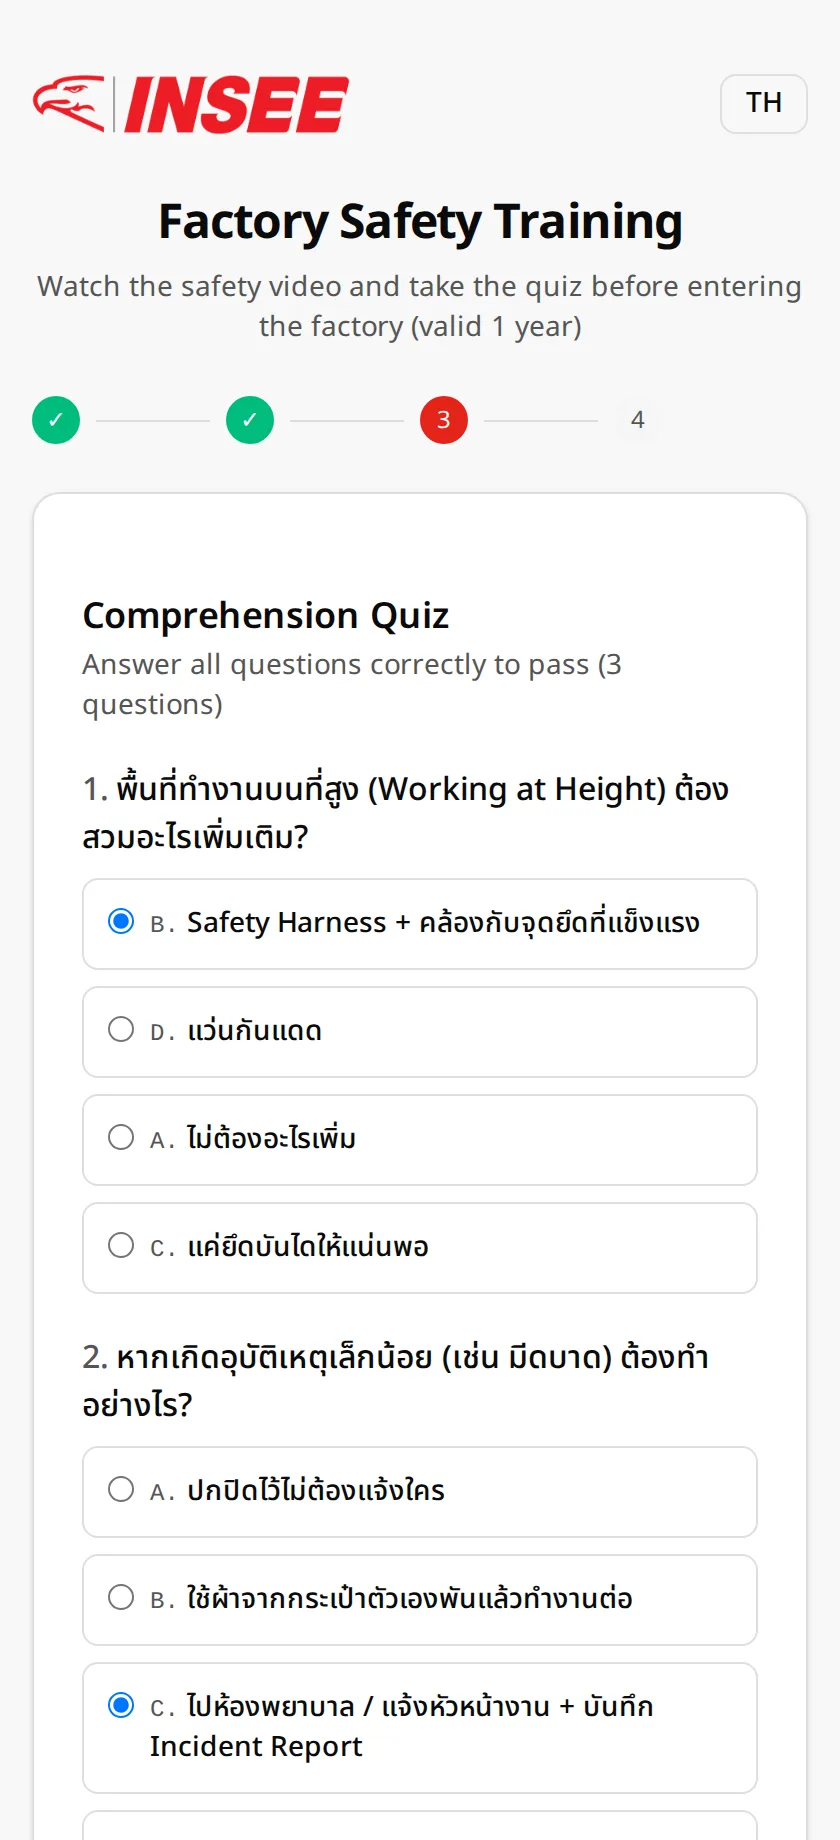
3-question comprehension quiz
4. Check status / wait for approval
While your request is being reviewed, you can check its progress and what each person still needs to do.
-
Check your own readiness
Home page → "Check access status", choose your ID type, enter your own passport or ID number and tap "Check".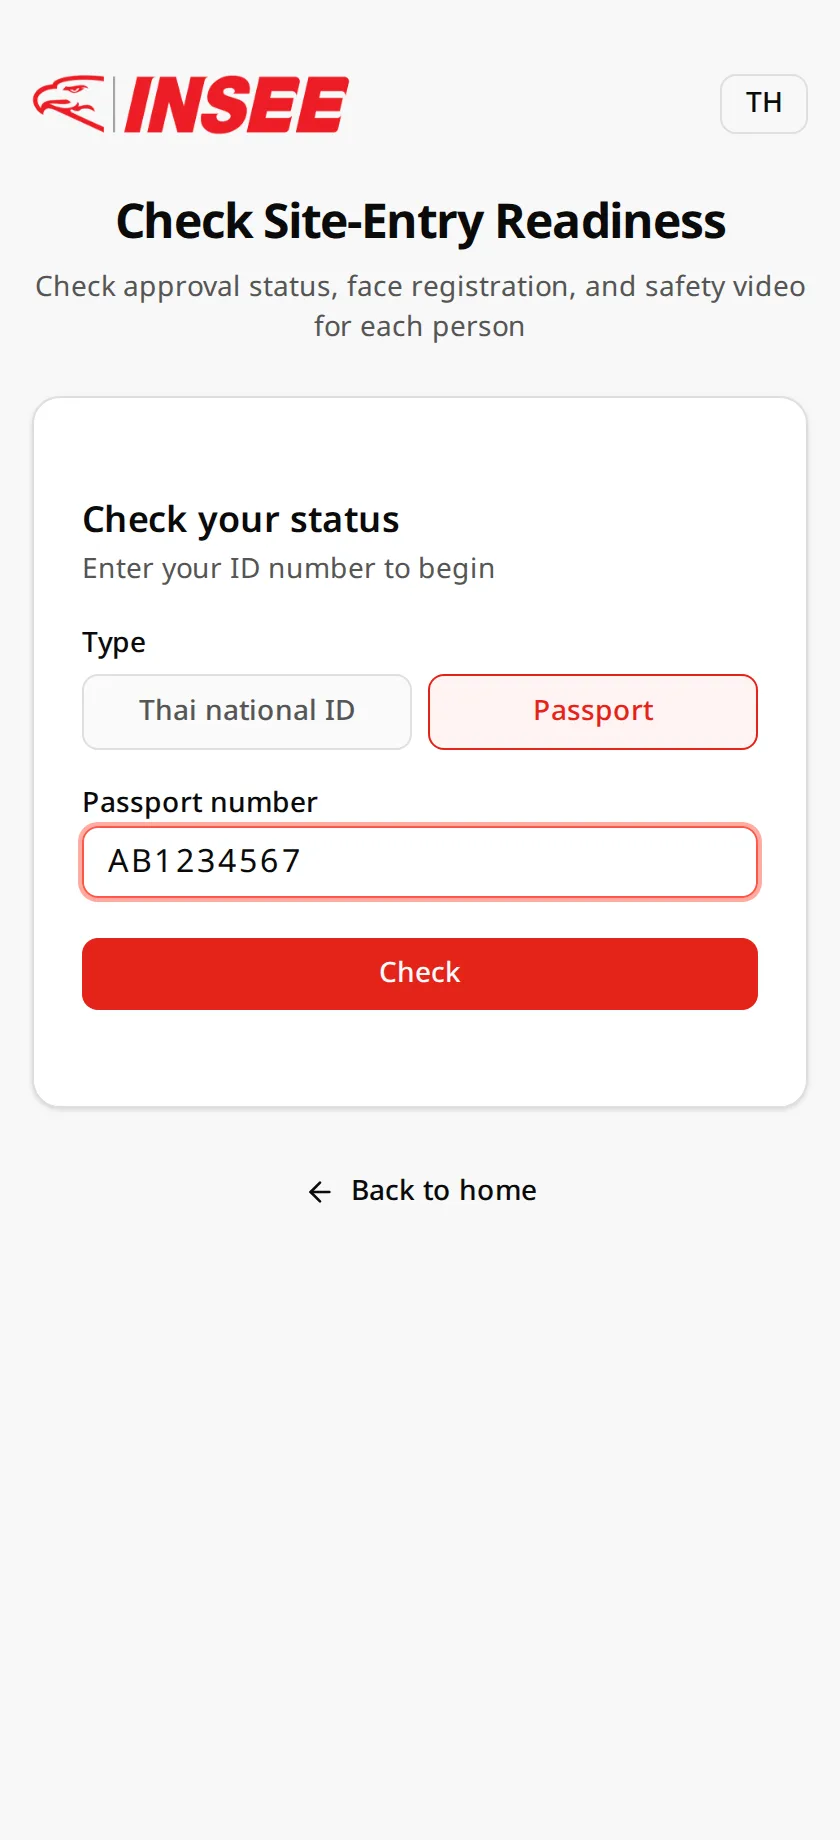
Access status check page -
See what is still missing
The system shows your per-person status: request approved or not, face registered or not, safety video done or not — every unfinished step has a button that takes you straight there.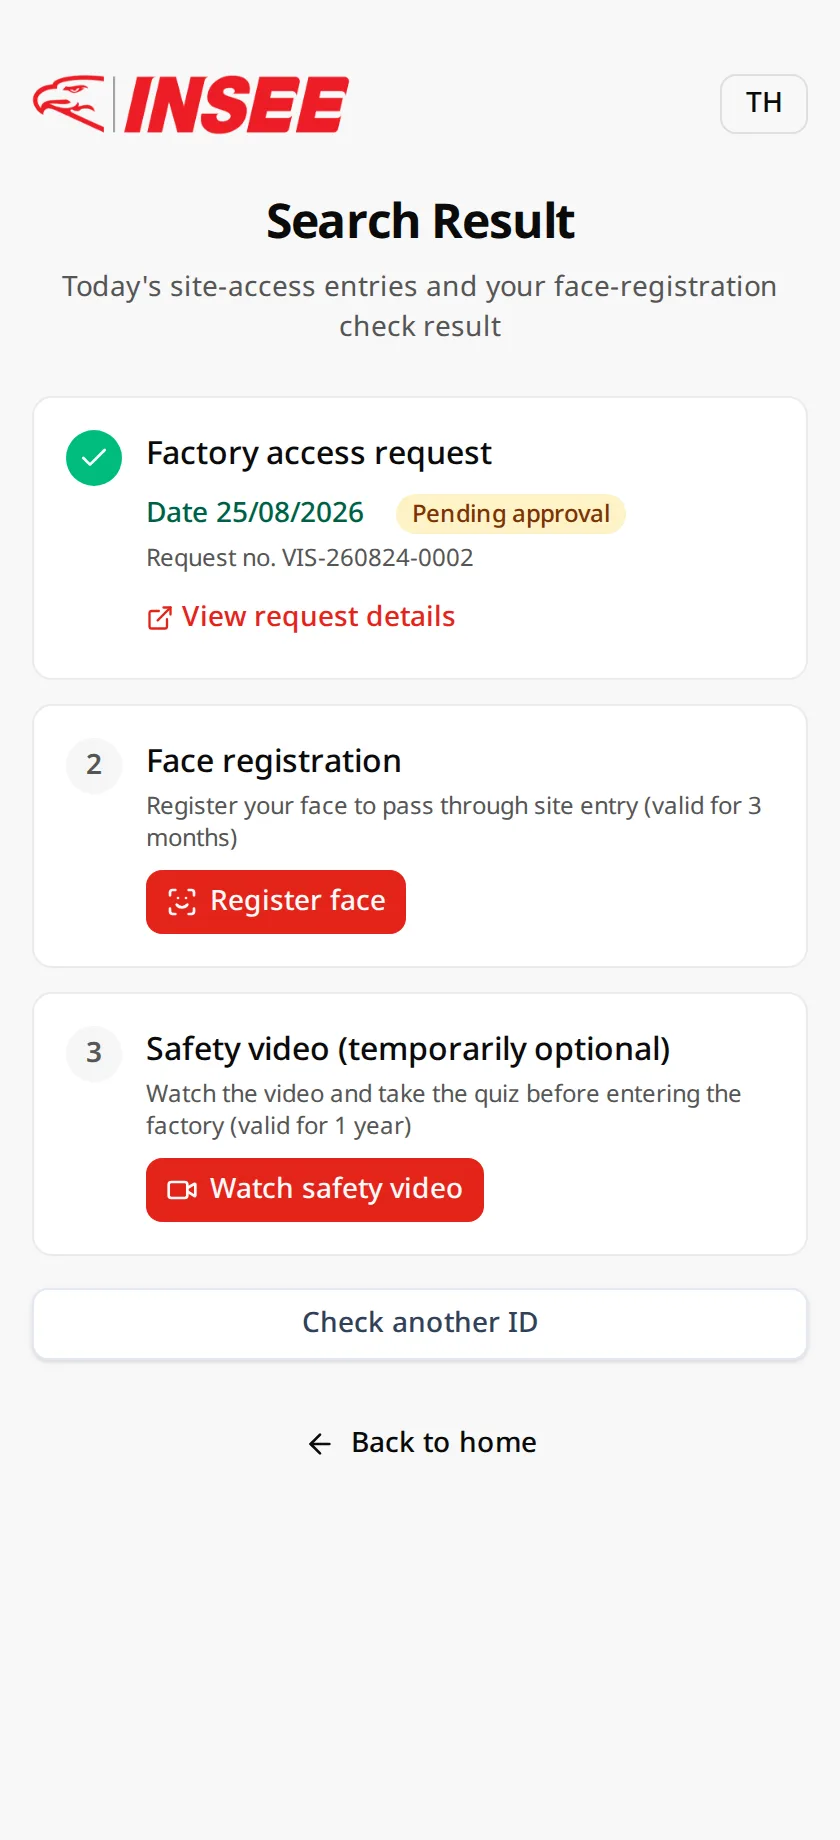
Check result while waiting for approval -
View the whole request
From the submit-confirmation page, tap "Check request status" to see the full request: approval status, people, vehicles, and each person's readiness — the request is approved by your INSEE contact or by staff.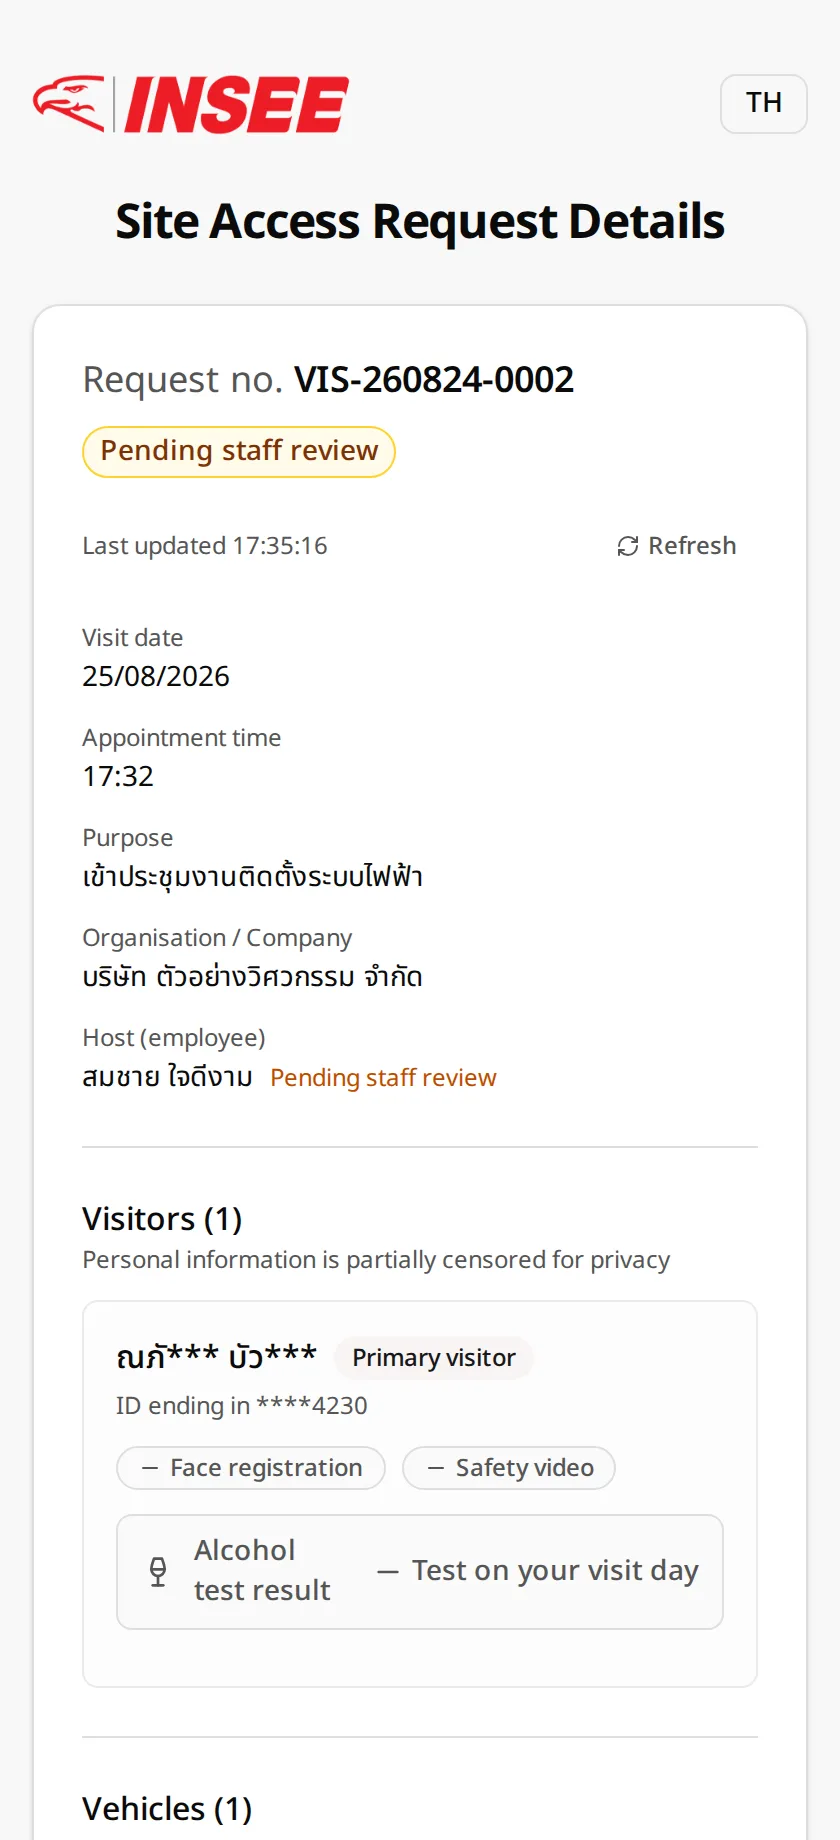
Request status page (pending)
5. Approved — ready to enter
Once the request is approved and every step is done, your status shows ready to enter.
-
Status changes to "Approved"
The request status page shows an approved badge — if you provided an email, the result is mailed to you as well.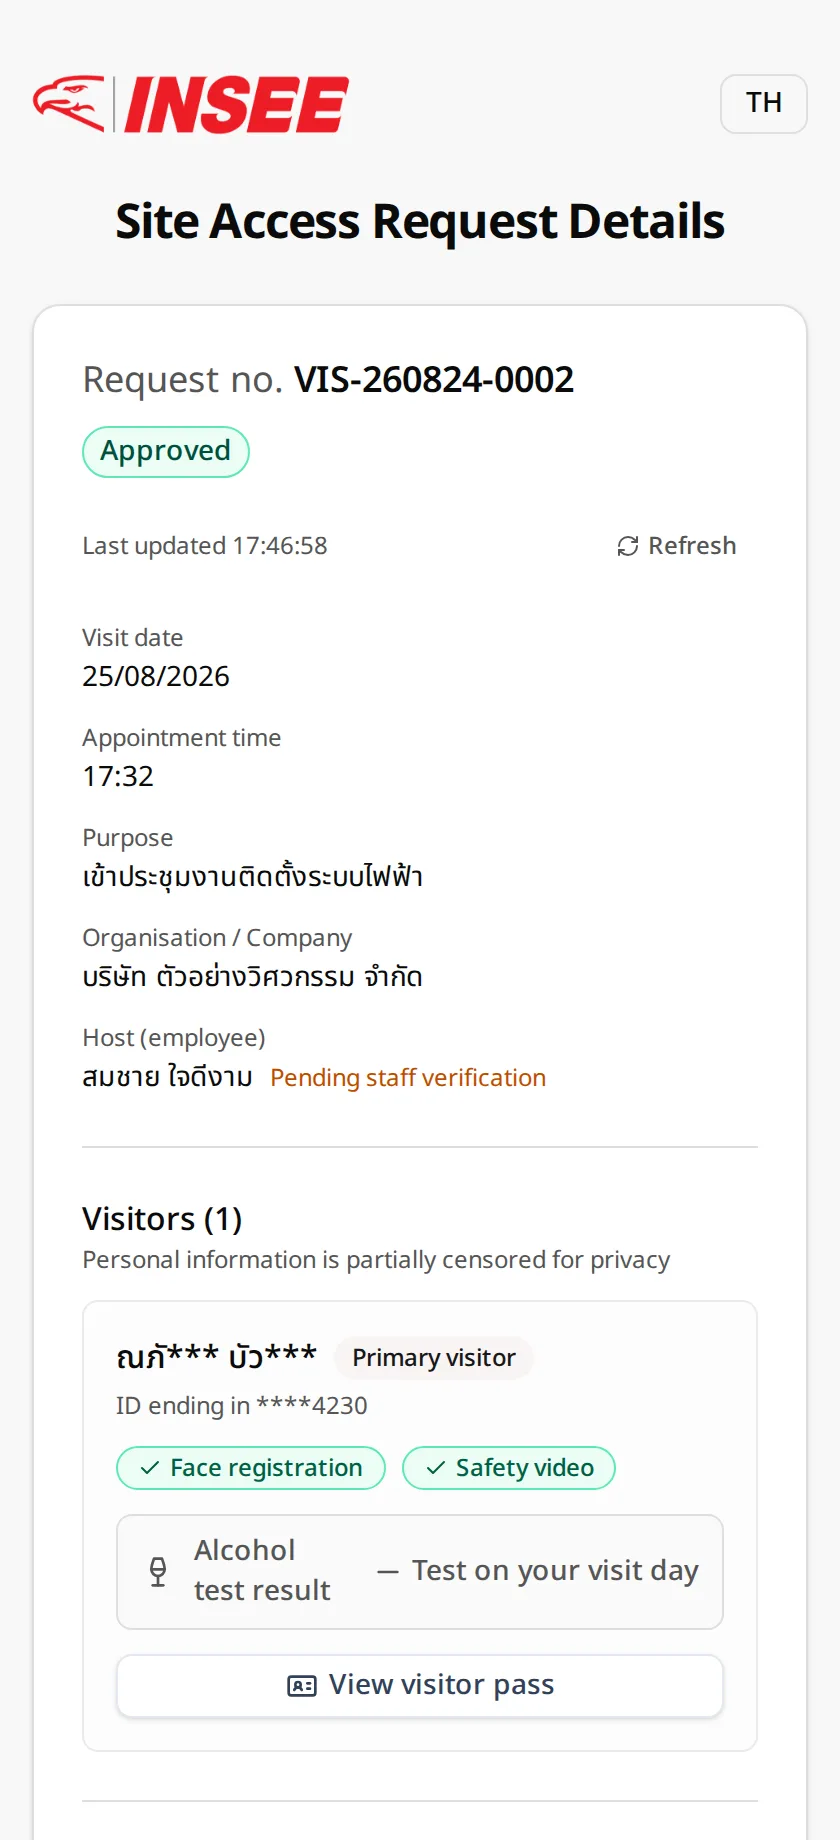
Request status after approval -
All steps green = ready
The status check page shows every gate in green: request approved + face registered + safety video passed.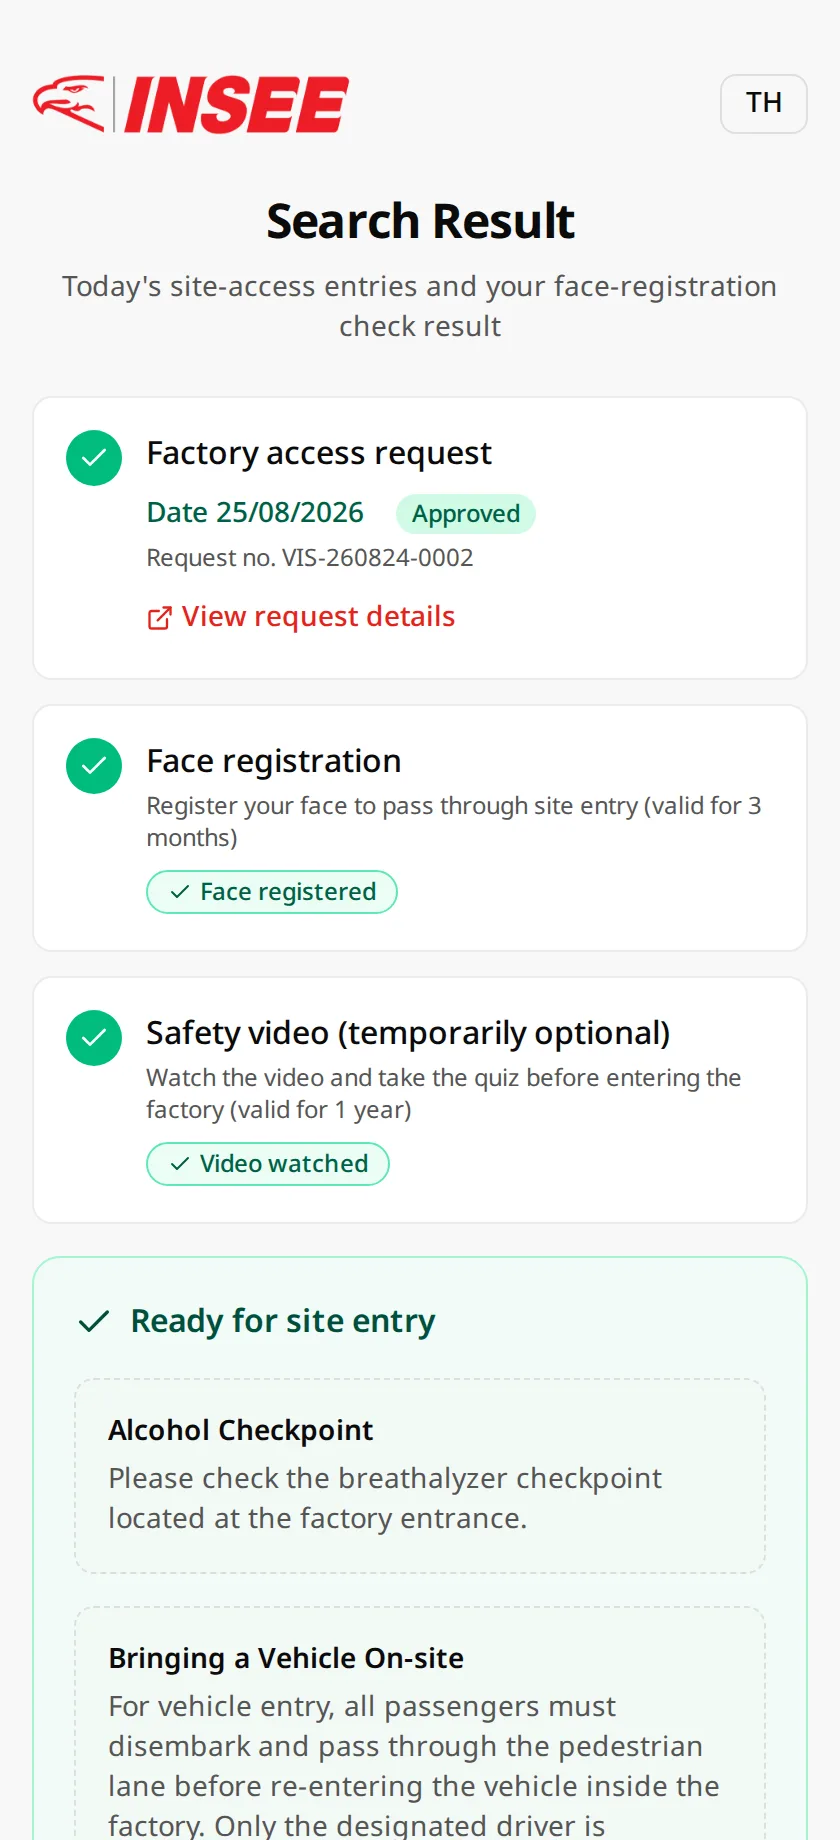
All steps complete — ready to enter -
Open your visitor card
From the request status page, tap "View visitor card" and confirm with the last 5 digits of your ID — show it at the reception point, or save it as a PDF.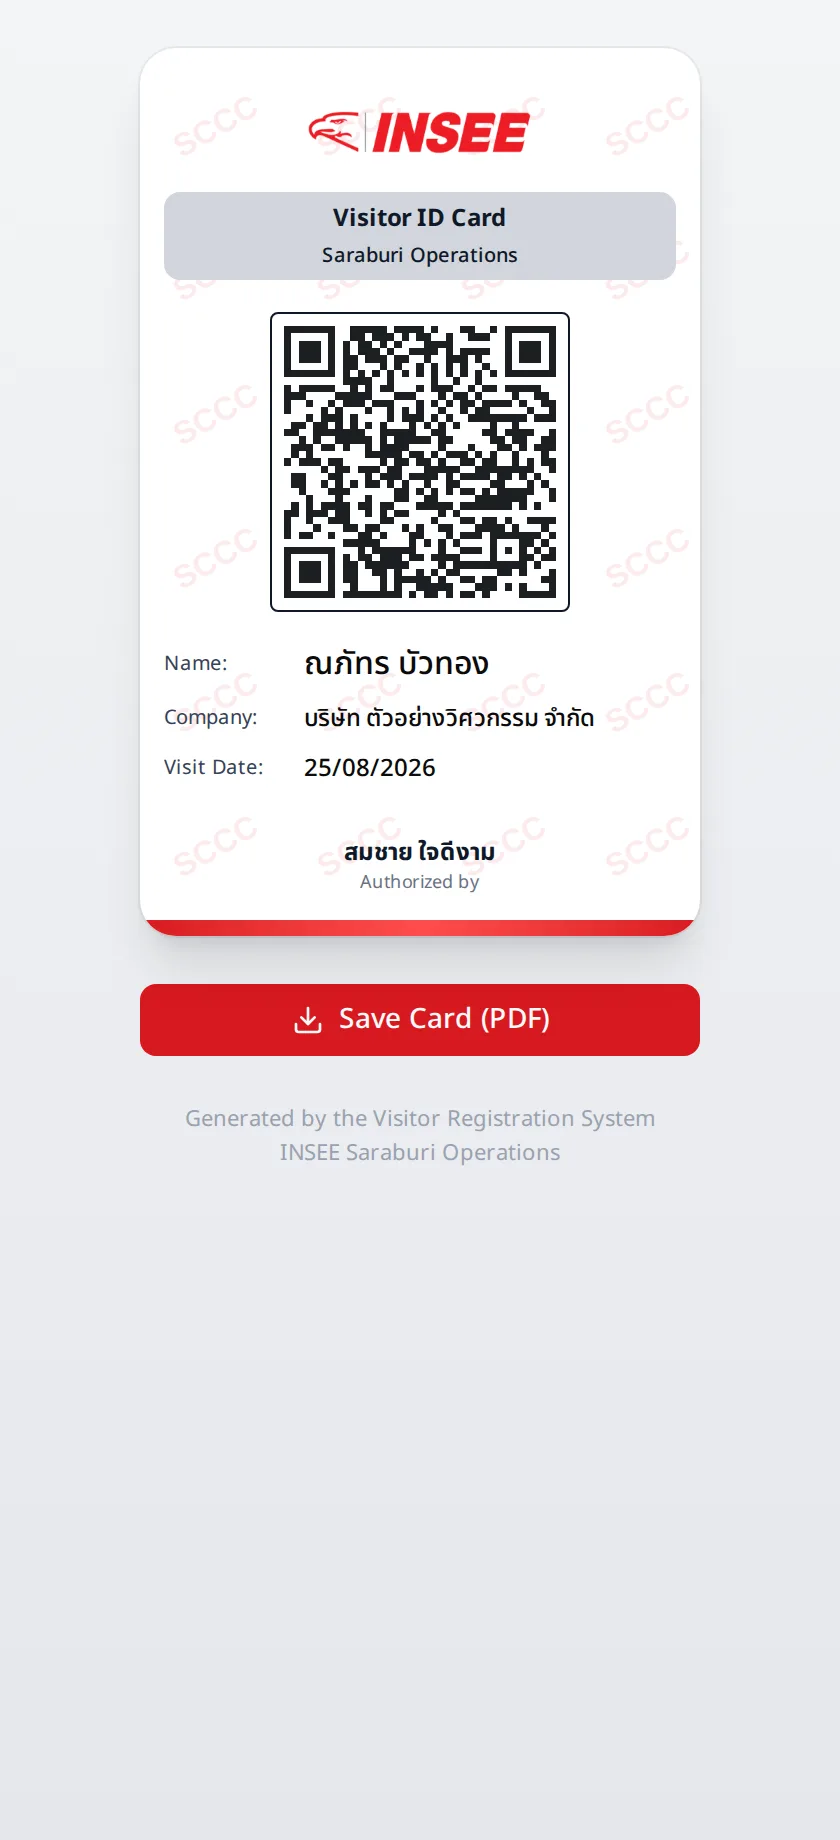
Visitor card
6. On the day of your visit
Bring your real ID card or passport, then:
- Report at the reception point — give your name or show your visitor card to the staff; if any step is unfinished, they will help you complete it
- Take the alcohol breath test before entering — blow into the breathalyzer at the checkpoint; the result is valid for 1 hour
- Walk through the gate with a face scan — enter by scanning your registered face, no badge needed
- Drive in only with the registered vehicle — vehicles listed in your request are granted access along with you